

SSH using Windows Subsystem for Linux wasn’t working for me. It usually does, but it’s not a perfect system and still has its limitations. I’ve recently run into one such limitation: Using SSH to connect to a machine through a jumpbox while connected to a corporate VPN. The problem seems to do with DNS, because if I changed the DNS settings in /etc/resolv.conf for WSL to use a generic public DNS, such as 1.1.1.1, I had all of the standard Internet access on my local machine within WSL, but it couldn’t find the machine I was trying to connect to on the corporate network. If I changed the DNS settings to use the corporate DNS, I could SSH into a machine just fine, but had no local Internet access within WSL. Also, this would break all of the time regardless, and I’d have to spend a significant amount of time trying to figure out the perfect DNS settings that got me to where I needed to be. So, I abandoned WSL for this particular application.
Instead, I turned to OpenSSH on Windows, which is now included on Windows 10. Since I was using Windows 10 using Microsoft’s built-in software, I figured it should just work. Well, of course it didn’t–that would be too easy.
The Problem
The problem with the version of OpenSSH being used within PowerShell or Command Prompt is that I still couldn’t connect via SSH through a jumpbox–it kept erroring out on the jumpbox with an error something like this:
posix_spawn: No such file or directory
However, this problem has been fixed in newer versions of OpenSSH. So, all that needs to be done is to replace the older, broken version, with a newer, less broken version. Here’s how to do that.
Download OpenSSH from GitHub
Download the latest version from this project:
https://github.com/PowerShell/Win32-OpenSSH/releases
There will be a zipped package called:
- OpenSSH-Win64.zip
Replace the Old Version of ssh.exe
- Unzip the zipped archive you just downloaded.
- Navigate to the following location:
C:\Windows\System32\OpenSSH\- We’re going to rename the current “ssh.exe” to “ssh-old.exe,” but we need to change the permissions to do this. Right click on ssh.exe and choose Properties.
- On the Security tab, click the Edit… button
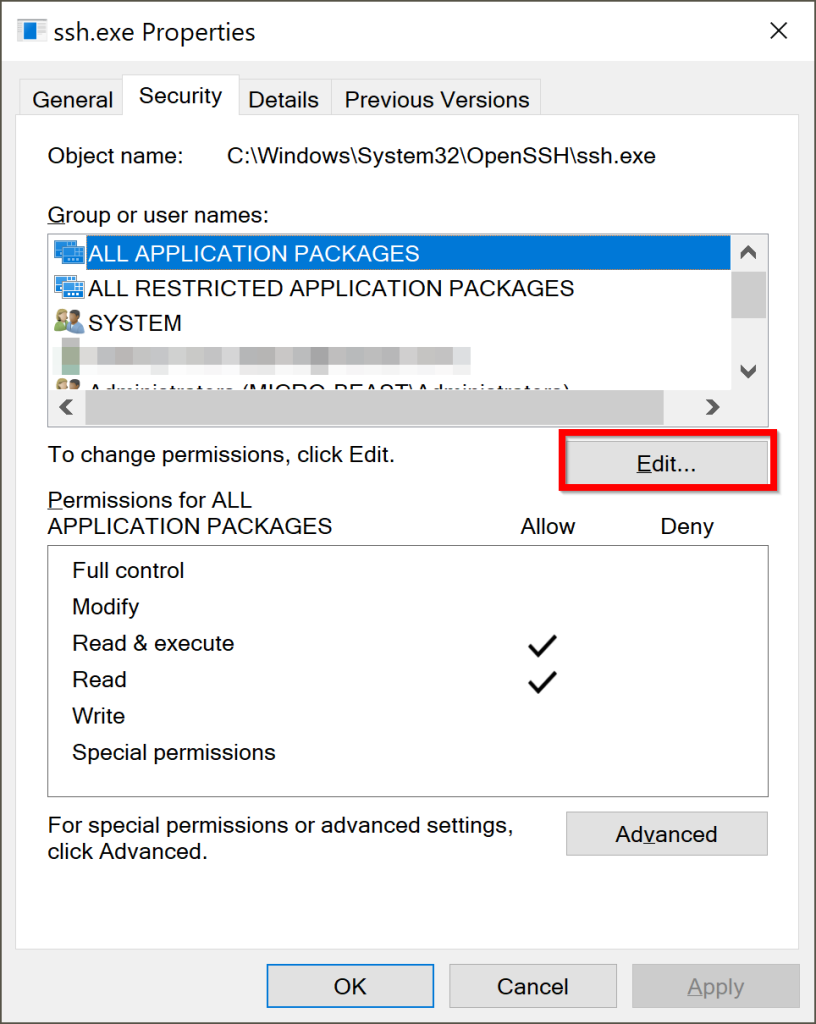
- Click the Add… button

- Type your username in the Enter the object names to select box and click the Check Names button

- Once your username has been verified by the Check Names button, click the OK button
- Select your username in the Group or user names list and check the allow Full control box

- Click the OK button
- You should now have the ability to rename the ssh.exe program to whatever you want (you’ll be prompted with the User Account Control dialogue to allow the name change). In this example I’m naming it “ssh-old.exe.”
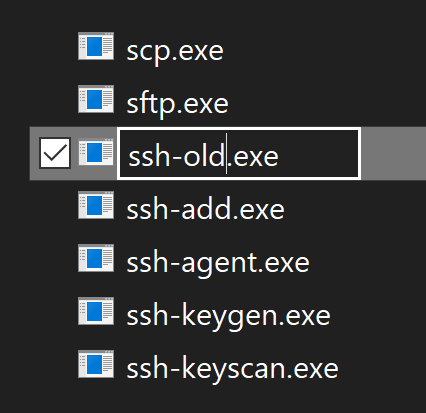
- Now, you can simply move the new ssh.exe program to the folder that contains the “ssh-old.exe” program, and PowerShell will start using it rather than the old one. Now, everything should work–yay!
